
General info
Sigfridsleden starts in Asa, north of Växjö and goes 88 km south, past Växjö, down to Knapelid south of Åryd where it connects to Utvandrarleden. From Asa to Växjö the trail is approximately 50 km. Trail is the wrong word though, as most of this route is on paved road. The route is part of a 4000 km network of pilgrim routes that goes from Trondheim in Norway to Santiago de Compostela in Spain.
Trip report
Last Friday I asked my father, whom my son would spend the weekend with, to drive me to Asa, where the trail starts. I’ve been here two times before, in the first week of January 2015 and 2016 on short overnight trips. Those times I only hiked a couple of km before setting up camp. This time though, I planned to hike the trail back to Växjö.
After studying the map I was prepared for a bit of road walking, and I didn’t have high expectations on the “trail”. But I saw it as a chance to get out, and as a workout as I planned to push myself and do high milage. The weather report predicted lows below freezing, so I decided to bring my Cumulus Panyam 600 and my Exped Winterlite, as I hate being cold.
I was dropped off at Asa church at around 18.30. I planned to hike for an hour or so, but I ended up hiking for two hours, and did ~9km. The first part follows a small road, which then turns into a logging road. After that you follow a trail next to the lake Asasjön. This part of the route was great, but short. I saw two roe deers and a crane on a field. They observed me, but as I came closer they left in a hurry.

I either walked through uneven forests or next too fields, so it took me a while to find a good camp site. I had checked the map and planned to set up my tent near Skärsjön. When I came there I saw that there was a shooting range, with the targets in direction of the cape where I had planned to set up my tent. I walked past the shooting range and found some flat ground on the shore of Skärsjön, outside of the danger zone.
The whole evening had been windy, and the wind really picked up after I set up camp. The rain started falling just after I got my shelter up. The ground was loose, so my stakes didn’t get a good grip. I made a quick dinner and then went to bed. I was to tired to even read.
A little before 01.00 I woke up after falling in and out of sleep since I got to bed. I saw that the wind was about to rip a couple of the most exposed stakes. I got up, put on a rain jacket and started looking for big rocks. Wet snow had started to fall. I anchored the most exposed stakes with rocks and crawled back into my sleeping bag. As I laid there I was afraid for the first time while hiking. The trees around me made cracking sounds, and I was afraid that one would crack and fall on me. When the gusts really picked up I actually felt the ground sway. At first I thought I was imagining it, but after a while I realized that it was the roots of the nearby trees that moved beneath me as the wind shocked them. I went to sleep with an image of me being impaled with torn off roots from a falling tree.


I woke up to a beautiful morning with clear skies. But the wind still blew hard, which made it hard to pack down the tent.
I left my campsite and started hiking a gravel road. There were a few short parts with trail, but after that the long, seemingly endless stretch of pavement begun. The route had changed, so my map wasn’t accurate, but I had a newer map in my cellphone.

After I had passed the village Tolg, I saw a strange tower on a hill in the distance. I Googled it, and apparently it was Nykulla Observation Tower, built in the late 1950s. I thought about going up there, but from the sign near the parking lot it looked like it opened in May.
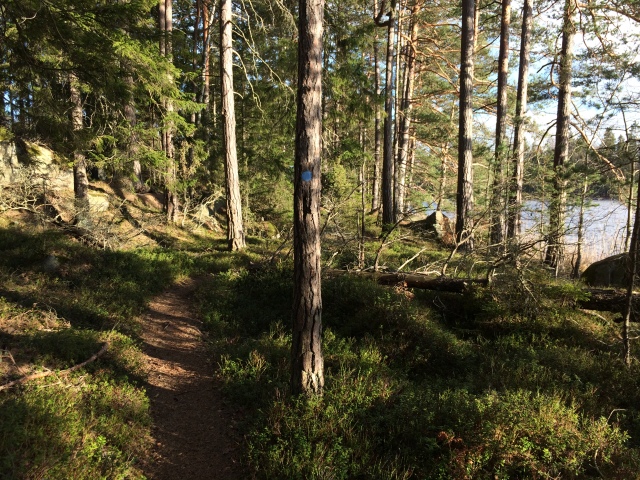
After the tower there was a short section of actual trail through a pine forest.

But then came the paved roads again. Endless paved roads for kilometer after kilometer. My feet cheered the few times they touched actual trail. I was in a bad mood, and thought to myself that the people that made this route must hate hikers, since most of it was on pavement. But I had myself to blame, since no-one forced me to be there.
As always I was looking for the perfect campsite. The route passed many fields and uneven forests, and I had planned to camp near Toftasjön, in Notteryd nature reserve. In the end my feet, calves, knees and thighs hurt. I was really tired as I had hiked nonstop, except for a 30-minute lunch break. I did the hike as a way to exercise and to see how far I could push myself in a day.
When I came to Notteryd I left Sigfridsleden and turned to the Notteryd circle trail. I followed the shore of Toftasjön out to the cape “Tungan” where I found a decent spot in a birch forest. The ground was pretty uneven, but at this point I didn’t care.

I was exhausted, and went to bed right after I had put up my shelter, at 20.00. I didn’t even make dinner. I had hiked somewhere between 37-40 km, which is a new record for me. I fell asleep and slept good the entire night.
I woke up at around 08.00, but stayed in my sleeping bag for a while. After that I took it slow, aired out the sleeping bag and dried out the slight condensation I had on the inside of my shelter.
A little after 10.00 I left my camp site and headed home. I followed the circle trail to the road, and then walked the rest of the way on the road that cuts through Fylleryd nature reserve, and I was back home in less than 2 hours.
I didn’t take a lot of photos on this trip. I saw a lot of small villages, farms, fields and pavement.
Would I recommend this hiking route? No, not unless you have a hiking nemesis that you want to trick into doing a really boring route. Or if you like hiking on paved roads. There may be a target group for a route like this, but for me, who hikes to disconnect from everyday life and to get in touch with nature the route was a disappointment.


